 It has taken me an eternity to finally post this but it is from Pam. I don't think she has a blog but here is a picture of her fancywork!!! It is so exciting to know that others are enjoying these luggage tags as much as I!
Showing posts with label luggage tag tutorial. Show all posts
Showing posts with label luggage tag tutorial. Show all posts
Monday, March 09, 2009
Another luggage tag friend!
It has taken me an eternity to finally post this but it is from Pam. I don't think she has a blog but here is a picture of her fancywork!!! It is so exciting to know that others are enjoying these luggage tags as much as I!

Tuesday, November 25, 2008
How exciting!!!
Uhhhmmmm......how did this post???? Look at the date at the top????? Did I lose an entire day during the last hour????????
I received this photo and letter from Maria about the luggage tag tutorial I posted a while back. It's so exciting that others are using what I created. I wish I were more creative as it a certain high knowing that others not only like what I created but want to share it with others. Below is the letter I received along with this great photo.

I received this photo and letter from Maria about the luggage tag tutorial I posted a while back. It's so exciting that others are using what I created. I wish I were more creative as it a certain high knowing that others not only like what I created but want to share it with others. Below is the letter I received along with this great photo.

Hi Morah,
I am a fellow quilter who doesn't have a blog but lurks on other people's :)I loved your luggage tag tutorial and have made a few on my own andfor my church fair. I went on a quilt retreat last week and made afew more and before I knew it I was giving a class in making them (nopayment, just sharing as you did) and this is what everyone made. Afew more were made after this picture was taken and everyone thoughtit was just a great project! Thanks for sharing your idea!
Maria
Thanks Maria and friends. You made my day!!
Sunday, August 03, 2008
Another luggage tag friend!
I really didn't think that my luggage tag tutorial was used by any one. (It's in the sidebar if you haven't visited the page) I hadn't heard from too many and wondered if it was usable. I guess it is because I received an email and a mention in Tanya's blog. Here is her finished tag.
If you have finished a tag and I haven't blogged about it, let me know and I will write about it.
Thanks Tanya!
If you have finished a tag and I haven't blogged about it, let me know and I will write about it.
Thanks Tanya!
Thursday, May 22, 2008
A finished luggage tag


AND NOT mine! Whoo hoo! I had sent the directions to Karen and lookie what she made! Beautiful! (I'm so excited that she was able to follow my directions!)
Tuesday, May 13, 2008
oooopppps
Had to post and repost and repost to get the printing to look right on the luggage tag. If it looks wonky you may want to actually click on my blog to see it rather than looking through bloglines ect......
LUGGAGE TAG TUTORIAL
After much agony and with great trepidation, I am posting the directions for my luggage tags. Thsi pattern is totally my creation. I had the basic pattern but it didn't close, didn't fold and wasn't private. That said, this is my baby so go lightly on me if there are any confusing portions. Hopefully not. Plus, I would appreciate simple credit if you use this for a guild project or any other project. (Boy, I am confident!) Feel free to contact me with the positive and negative....I can take it! LOL! I have enjoyed many, many of patterns, tips and tutorials courtesy of blogland. This is my little thank you. Enjoy !
If you make a tag, drop me a note and a picture and I'll add a link to show it off for you!!!
Luggage Tag
These tags are great for more than just luggage. Attach to backpacks, sewing machine cases or sewing toolboxes. I have one on each item I take to retreat. We all have rolling toolboxes…mine is the only one with the “naked cowboy” luggage tag!!!!! My nephew attached his baseball tag to his backpack for school! DH has one football tag and one comic strip fabric tag. They are so much fun to make!

* It is nearly impossible to attach the plastic with out a “Teflon” or non-stick foot. Do yourself a favor and invest the couple of dollars it costs for this foot. You will NOT regret the purchase and as an added benefit your family will not be subject to your creative vocabulary while trying to use a regular foot on plastic!

Place the plastic 1 ½” down from the short side, and centered between the fold and edge of tag. (You don’t want to catch the plastic in the seams later on.) See the picture below? IT IS WRONG! YOU MUST HAVE THE TAG OPEN AND FLAT WHEN YOU ATTACH THE PLASTIC PROTECTOR!

If you make a tag, drop me a note and a picture and I'll add a link to show it off for you!!!
Luggage Tag
These tags are great for more than just luggage. Attach to backpacks, sewing machine cases or sewing toolboxes. I have one on each item I take to retreat. We all have rolling toolboxes…mine is the only one with the “naked cowboy” luggage tag!!!!! My nephew attached his baseball tag to his backpack for school! DH has one football tag and one comic strip fabric tag. They are so much fun to make!

• Fabric at least 7.5”X 12.5”
• Matching fabric cut 12” X 2 ½” for strap
• Fusible interfacing the same size – I used DecorBond. You can use any type of heavier interfacing/craft interfacing. You want this to have a bit of body.
• Clear plastic/vinyl – I bought mine at Joann’s. It is on the long rolls with the plastic tablecloth and home dec fabric. It is the “blue writing on the backing paper” weight.
• Zipper foot
• Teflon (nonstick) foot for your machine. This is a lifesaver!!!
Make a Pattern
With the pattern material of your choice, (I used a mailing envelope. You can use a manila folder, a piece of cardstock….anything that is long enough to cut to the right shape. It isn’t necessary to be durable), measure a rectangle that is 12”X 3.5”. Cut it out. (For accuracy, I used a rotary cutter and ruler to cut out my pattern). Mark the center on one of the short ends. Then, working from the same end, measure and mark 1 ½” down on both sides. Create the angle of the luggage tag by drawing a line from the center dot to each of the marks along the side. (my picture is for demonstration only. The actual pattern is not the same color) Cut on the line to create the angle of the pattern. (Again make sure this is accurate as it is you pattern. )
Cut the Fabric and Interfacing
Fold the fabric in half to measure 3.5”X 12.5”. (I was fussy cutting my fabric so my photos show a much bigger piece of fabric. I have the pattern lying along the fold. That is extra fabric at that the top) Lay the pattern on the fabric with one long edge along the fold.
Cut the fabric.
*I used a rotary blade and ruler to make nice clean cuts. Lay the ruler on top of the pattern and cut along the edge. Repeat on all sides. If you have trouble with the pattern slipping, put a piece of tape under it to hold it to the fabric.
* Because I was fussy cutting, I made a see thru template. The rest of the cutting photos will use the see through template.
*Don’t mind the blue tape on the edge…it is so you see the template. Also, the ruler is only being for cutting, not to measure.
When you open the fabric it will look odd!
Blunt the tip of the point by measuring in ¼” and cutting it off. (I noticed that I didn't blunt the tips in this picture...or the next.....BLUNT the tip even if I did do it out of order!)
Cut 2 separate pieces of interfacing. DO NOT cut on the fold. You need these to be separate so that the tag folds nicely. Cut the interfacing with a separate pattern down ¼” 4 sides. Cut down the 3 sides shown plus the shorter side (The picture does not show the ¼” cut off the shorter side). There is no need to cut the second long side (in this case, the picture is right!)

Fuse the interfacing to the wrong side of the fabric. Use the picture to help with placement. As you can see, I wing it with trimming the interfacing. It isn’t perfect!
This odd shaped piece will be folded in half to be finished. Before we continue, you need to choose which half you will finish to the inside of the tag and which will be the outside. The outside of the tag is what people see while the inside will hold your label.
Adding the vinyl label holder
Cut your piece of vinyl/plastic to measure 4 ½” X 2 ½”
We will be working the portion of fabric that finishes to the inside for this step…... NOT the inside of the tag as in the interfacing side but the side of the fabric that will finish TO the inside. In this picture I have folded the tag to make sure that I will be adding the plastic label protector to the correct side. You are looking at the outside of the tag….The label will be inside…where the woman’s head is!

* It is nearly impossible to attach the plastic with out a “Teflon” or non-stick foot. Do yourself a favor and invest the couple of dollars it costs for this foot. You will NOT regret the purchase and as an added benefit your family will not be subject to your creative vocabulary while trying to use a regular foot on plastic!
Place the plastic 1 ½” down from the short side, and centered between the fold and edge of tag. (You don’t want to catch the plastic in the seams later on.) See the picture below? IT IS WRONG! YOU MUST HAVE THE TAG OPEN AND FLAT WHEN YOU ATTACH THE PLASTIC PROTECTOR!

I use a piece of blue painters tape to hold the plastic in place while sewing. Using a short, small zig zag, sew three sides…the short side closest to the edge and both long sides. (if you would like you can hand or machine embroider your information and lay it under the plastic before stitching. If you do this, you can stitch down all 4 sides of the plastic and enclose the information.) Be sure to backstitch at the beginning and the end. Sew very close to the edge of the plastic. See the picture below? IT IS WRONG! YOU MUST HAVE THE TAG OPEN AND FLAT WHEN YOU ATTACH THE PLASTIC PROTECTOR!
Can you tell I had to rip apart my example!?!?!
Make the strap
Press the strap fabric in half lengthwise. Open it up and using the center press mark as your guide, fold in both sides to meet the center. Press and then fold in half along the original press line.
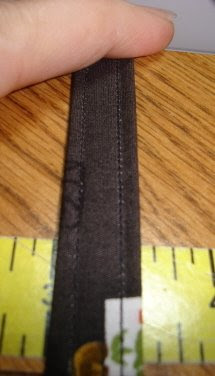
Switch to your zipper foot. First sew the strap along the open edged. Then sew the other side. It just looks better.

Attach the Strap
Fold the luggage tag, right sides together, along the fold where the two pieces of interfacing meet. Pin the strap on the inside, along the blunt tip with the edge of the strap at the edge of the tip.
Match the sides and pin. Using a ¼” seam, sew around all the sides making sure to leave an opening to turn the tag. When sewing the blunt tip end, be sure to pivot and keep the tip squared off. Also, I always go back and forth when crossing the strap to reinforce the stitching. (That is, I go across the short area where the strap is, backstitch back across and then go forward again and continue on with my seaming)
Trim the corners and turn the tag right side out. I use a chop stick to poke out the corners.
*You see where I have the opening for turning? I find it works best there and it is where I always place it.
Tuck in the unfinished edges where you turned the tag. Press. DO NOT PRESS OVER THE VINYL/PLASTIC!
Using the zipper foot and working close to the edge, top stitch all sides.
Making the closure
Along the short end, mark a line 1” down and approximately ½” in on each side. Following your machines’ directions, make a button hole (YES! A buttonhole!) along this line. My machine has a buttonhole foot along with the settings for an automatic buttonhole or a manual buttonhole. I needed to use the manual setting. (Don’t be scared off here because of the buttonhole. You just need to have a finished opening to close the tag. It doesn't need to be perfect or beautiful! I always have trouble with my buttonhole but end up with a reasonably good looking opening. )
Use your seam ripper and open the very large buttonhole! At this point take a few minutes to trim the edges of the buttonhole. I always use a marker to color the edges where the interfacing shows.
Write your information on a piece of paper and insert it in the plastic ………and ….
………………..Insert the strap into the buttonhole ………………………..
…..VIOLA’! You have a luggage tag ready for vacation!
Tuesday, February 12, 2008
Luggage Tags
I WILL CREATE THIS TUTORIAL....I PROMISE! I'M TRYING TO FIGURE OUT HOW TO DO IT. I don't want to manipulate the photos in blogger as then you cannot enlarge them. I'm not going to buy a program just to do it. So....I'm trying to figure it out. Any suggestions?????
Tuesday, December 04, 2007
Luggage tags..again
A number of people have asked for the pattern for the luggage tags. Well, I've been contemplating making a tutorial on them. There have been so many generous quilters out there that I would like to give something back. Give me a little bit and I will get it posted. I already have taken the pictures. It is not a published pattern to begin with (as far as I know). Plus I really changed the original alot. Again, give me to the end of the week to get it posted.
Saturday, November 24, 2007
Luggage Tags
We made luggage tags at our annual guild event. It is a make and take evening. The tags we made were the size of the ones pictured but all personal information was exposed. I adapted the pattern so the info would be on the inside. Here are two of them closed.... Here they are opened. A business card fits in the clear vinyl pouch.
 Can you guess which one is mine and which one is DH's???
 Here it is completely opened...to the outside.
 This is a closeup of the inside.
 Fun, fast, easy and I only needed to throw away 2 prototypes. Of course, after that it took three more "not so good looking" tags to get the pattern down right. But, I'm there now.
 Here they are opened. A business card fits in the clear vinyl pouch.
 Can you guess which one is mine and which one is DH's???
 Here it is completely opened...to the outside.
 This is a closeup of the inside.
 Fun, fast, easy and I only needed to throw away 2 prototypes. Of course, after that it took three more "not so good looking" tags to get the pattern down right. But, I'm there now.
Subscribe to:
Posts (Atom)
LinkWithin


